


Publish with Profit. Transform your Words into Wealth
Create a blog and newsletter to reach a global market and maximize your profits with ghost
The contact page is always a "must-have" page on every website, it seems to be popular so anyone can do it, but most people have problems with this page.
Even if you use WordPress, it won't be easy to create a standard contact form that balances operation and design even with the help of expensive plugins.
Creating a contact page isn't as easy as many of you think😅, and it's never been that simple.
This article will help you quickly create a standard contact form, manage messages, and fly technical concerns.
What's even better is that you can do it right on the ghost site without touching the theme.
1. Create Contact Pages and HTML Forms
First, you create a new page, without selecting the Page Template. You just create a normal Page page and name it Contact slug arbitrarily.
Next, you create an HTML form pasted into an HTML Block of Ghost.
A contact form will have common fields that are:
- Form title
- Sender information (name, email, website)
- Message content
- Attachments (usually only used to report errors, if the contact is normal, you don't need to)
You can copy the form I used in a streamlined way below as follows.
<form action="https://submit-form.com/<YOUR_ID_FORMSPARK>">
  <!-- Main form -->
  <input type="text" name="name" placeholder="Your name..." required><br>
  <input type="email" name="_replyto" placeholder="Your email..." required><br>
  <input type="text" name="subject" placeholder="Title" required><br>
  <textarea name='message' placeholder="Message..." rows="4" required></textarea><br>
  <div class="g-recaptcha" data-sitekey="6xxxxxAAAIAKV6sPRieSCGTYRLrFVsOs6Q1g" style="height:78px"></div><br>
   <!-- All hidden field -->
  <input type="hidden" name="_feedback.success.title" value="Your message sent successful"/>
  <input type="hidden" name="_feedback.success.message" value="I will respond to you as soon as possible."/>
  <input type="hidden" name="_email.subject" value="Have a new message"/>
  <input type="checkbox" name="CUSTOM_HONEYPOT_NAME" style="display:none" tabindex="-1" autocomplete="off"/>
   <!-- A button of type submit -->
  <button type="submit">Send it →</button>
</form>
Pay attention to , this is the key for the next steps because the above 4 data will be sent thanks to .Form ActionForm Action
P/S: You can customize more fields with just a few lines of code. Learn more about creating HTML forms at W3schools.
2. Choose an HTML form management tool
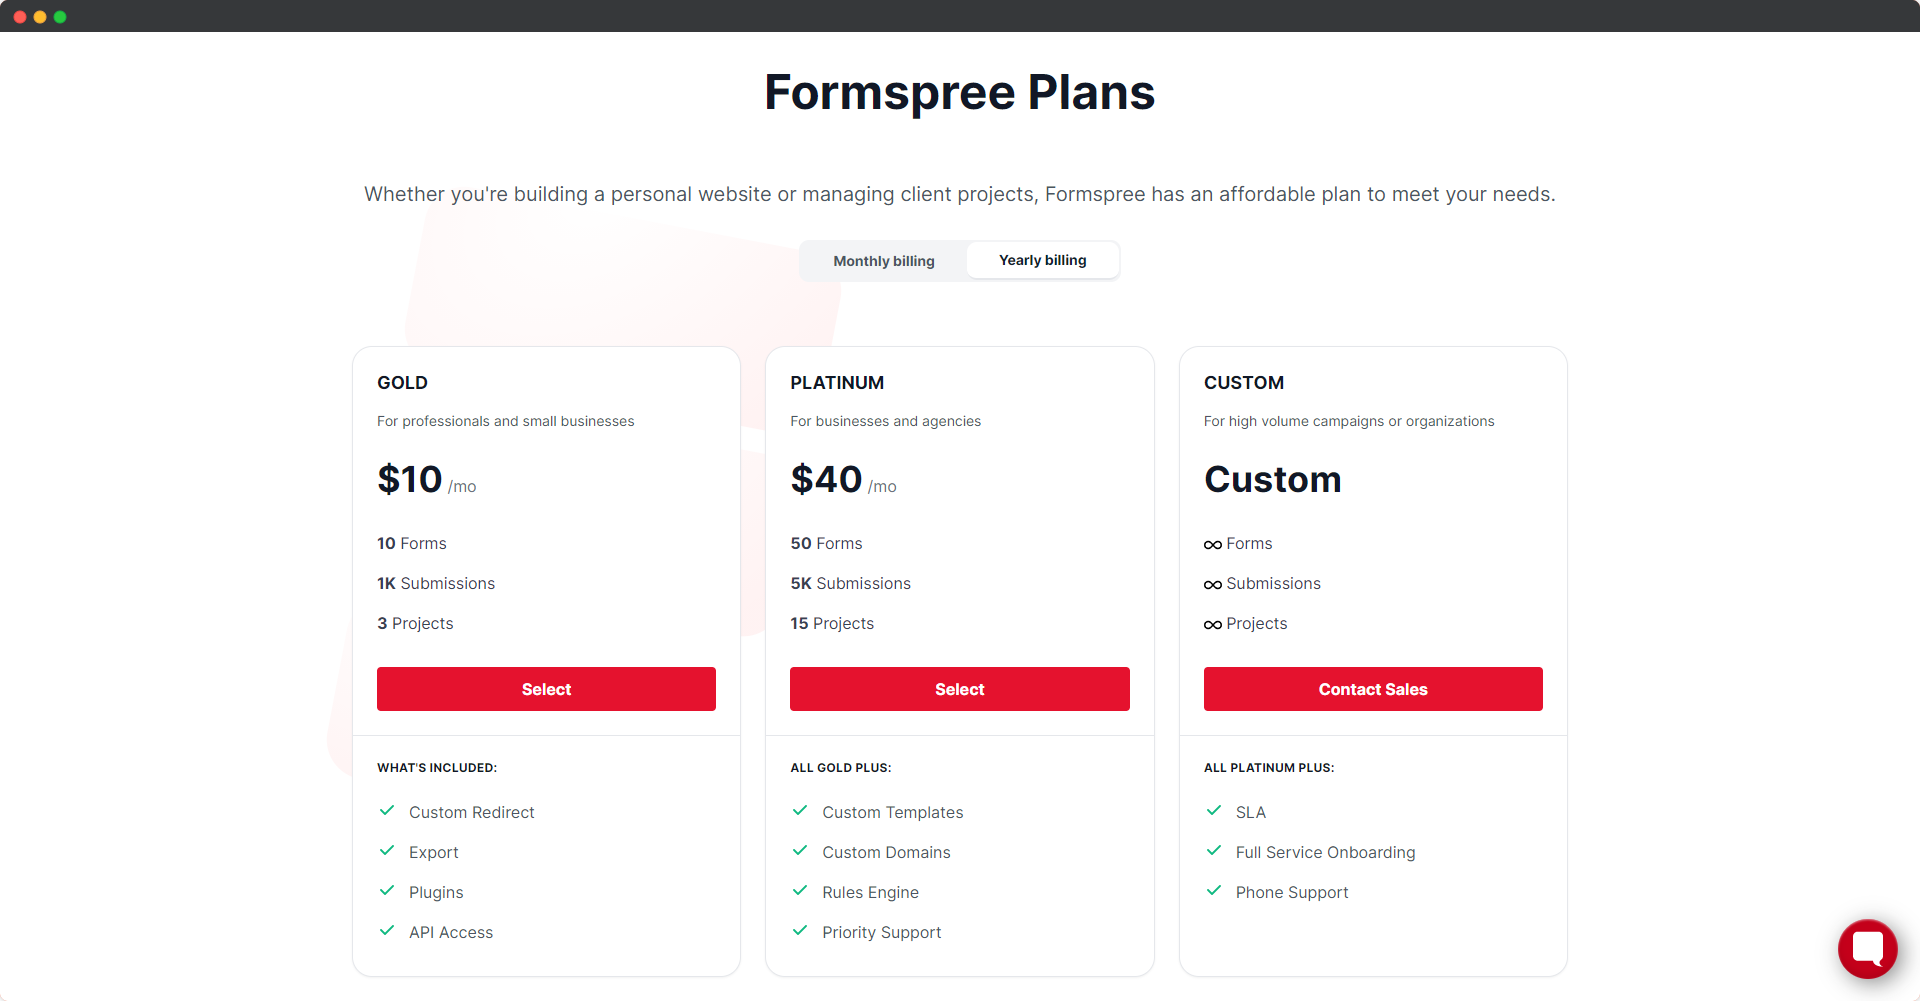
You've probably heard of Formspree, a multi-platform HTML generator and the 100% choice of Ghost theme developers for contact form integration.
Formspree is one of the pioneering HTML form businesses that should have market share in the market.
However, there are 2 major shortcomings of Formspree
- Few improvements if not no updates
- High price
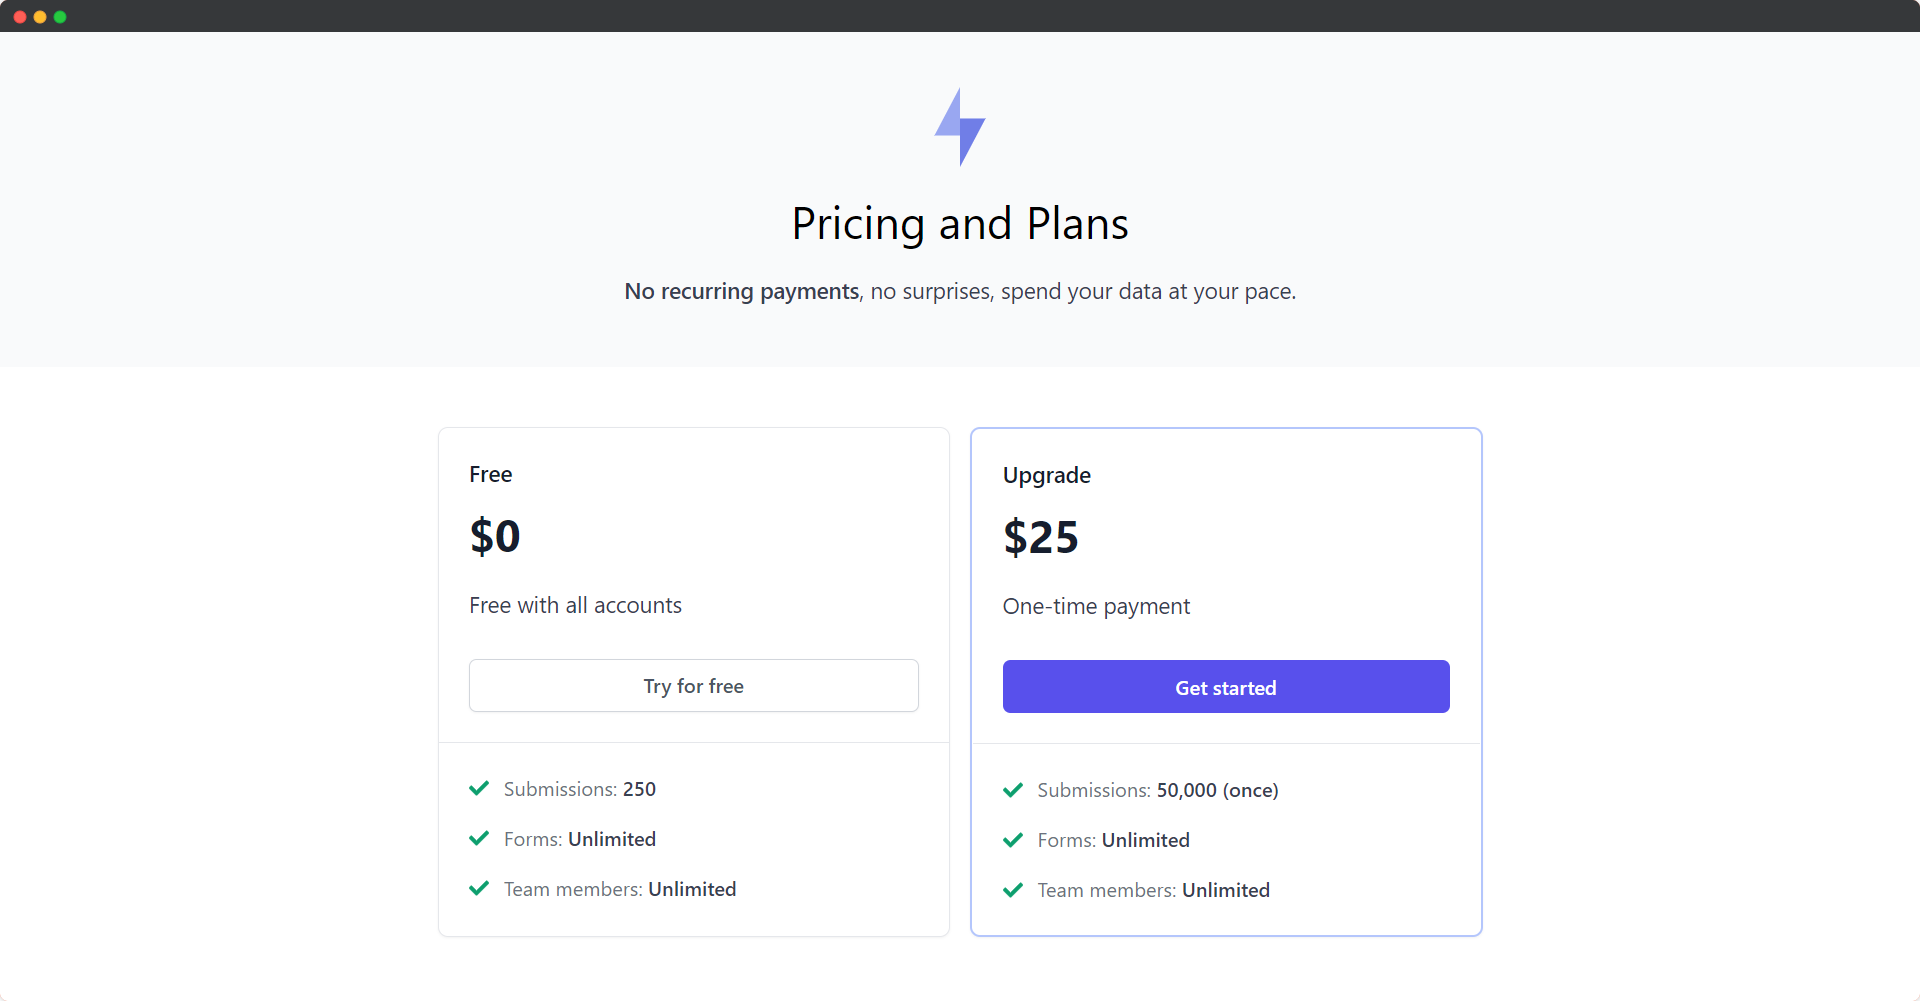
I encourage you to use Formspark instead of Formspree because of the LOVING PRICE but NUCLEAR😁 TECHNOLOGY
3. How to Use Formspark
Once you sign up for a Formspark account, you can create a form right away, no lengthy Visa card or account verification process required.
Each form created will have a unique ID for that form corresponding to a URL.
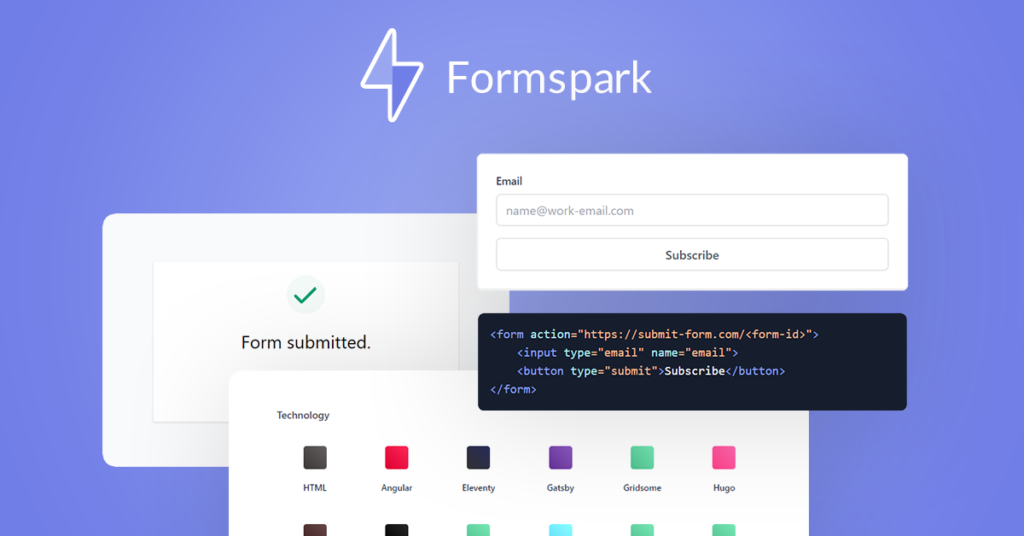
<form action="https://submit-form.com/xxx4UJR6">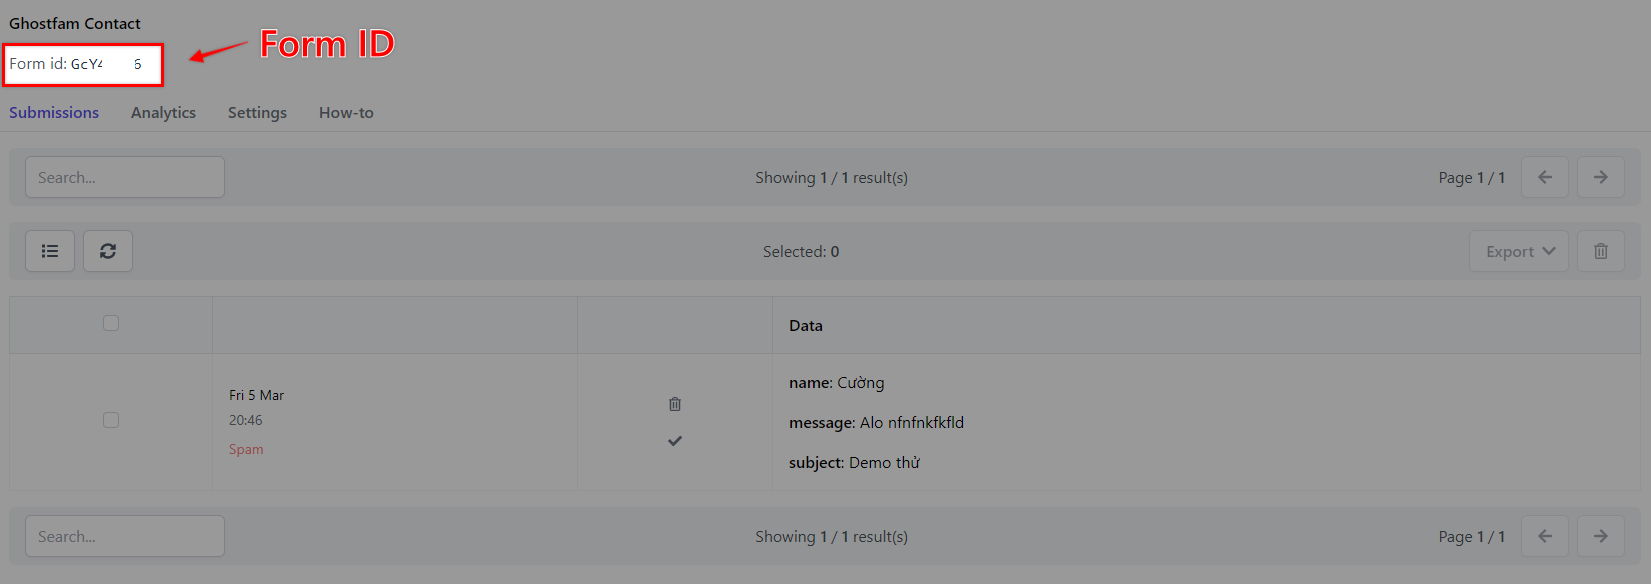
You will use this address for form action , I mentioned above.
Basically, you've created a contact form.
4. Make spam a thing of the past
Did you know, all comments or forms must be spambot-proof (the reason I use Hyvortalk comments is because it is very effective against spam) otherwise your whole contact page will become a disaster of spam.
Luckily, unlike other HTML form management software, Formspark has Akismet built into their anti-spam filter, you already have a layer of protection in place from the start.
However, subjectivity will harm you, you must strengthen your anti-spambot fight with the free Honeypot. Not the default honeypot, but the custom honeypot.
Honeypot will help you fight spam and honeypot is technically free, we should not waste it.
To complement the Honeypot, we need to add Google reCapcha to make sure. We recommend reCapcha v2 because it is the most efficient (better than reCapcha v3). hCapcha is annoying for users, if not really necessary you should not use it.
The most effective is the 3rd layer, Botpoison, which is the most effective anti-bot service available today and has a starter free plan. Disclosure: Botpoison and Formspark are the same company 😅.
So your form will be completely immune to spambots 😋
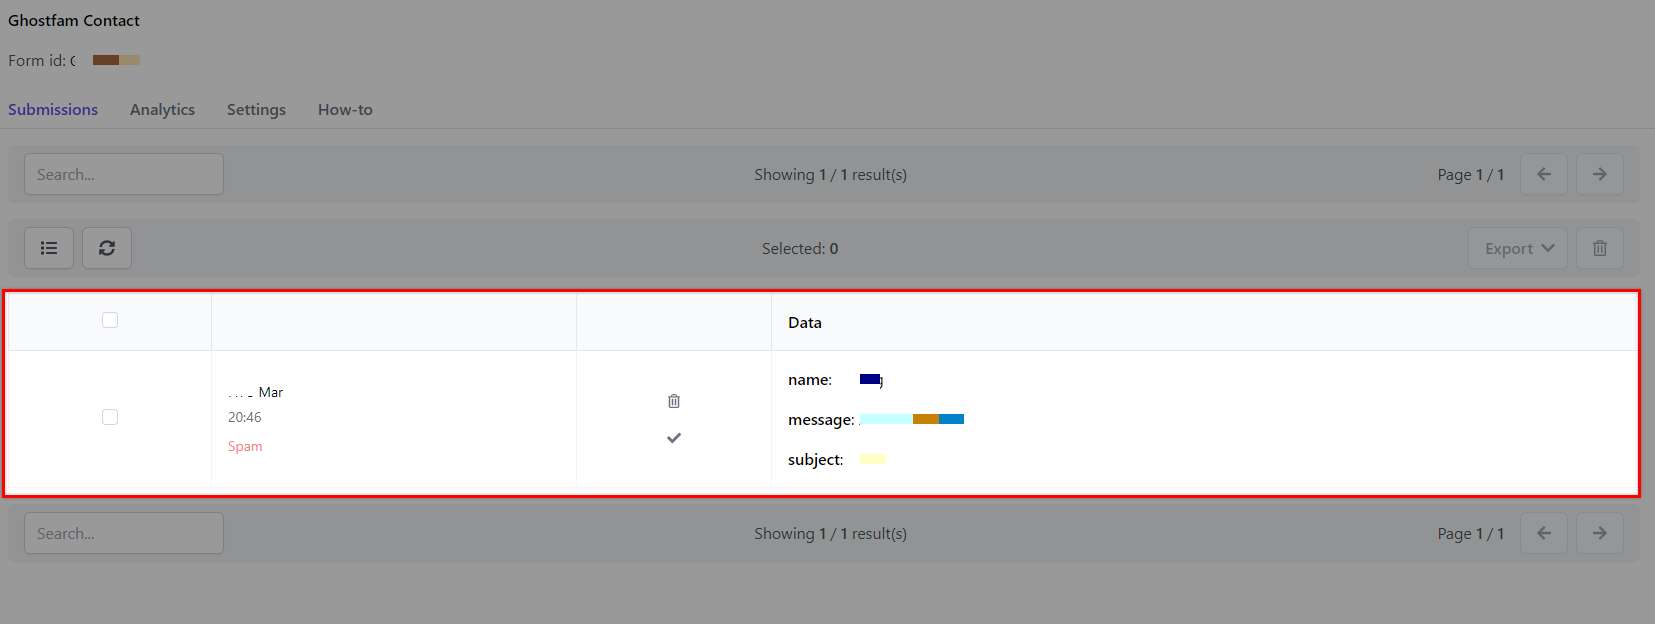
5. Manage messages sent to you on the Formspark Dashboard
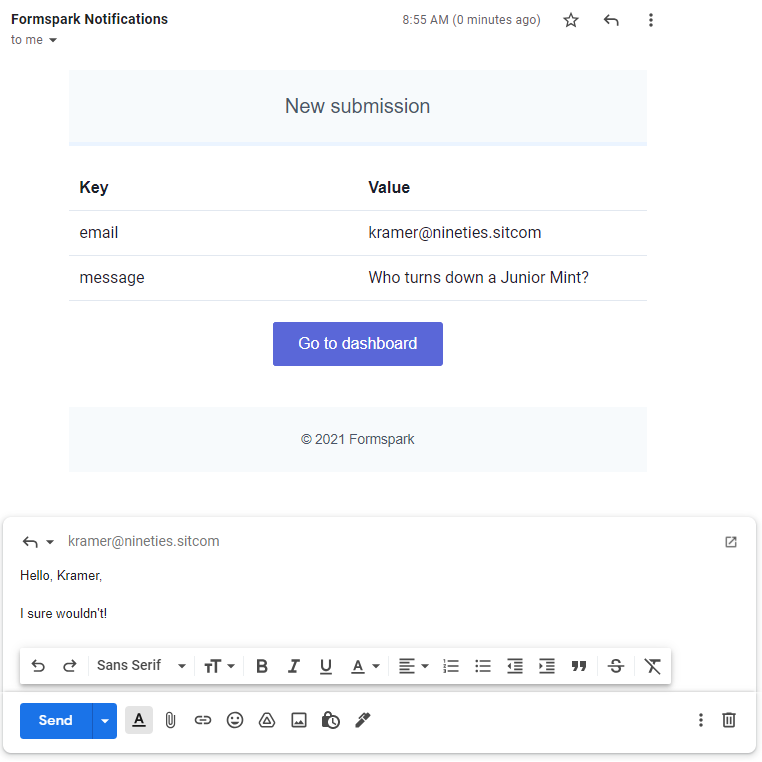
The dashboard is where all messages sent to you via the form are stored, and the great thing is that it has a very good notification system.
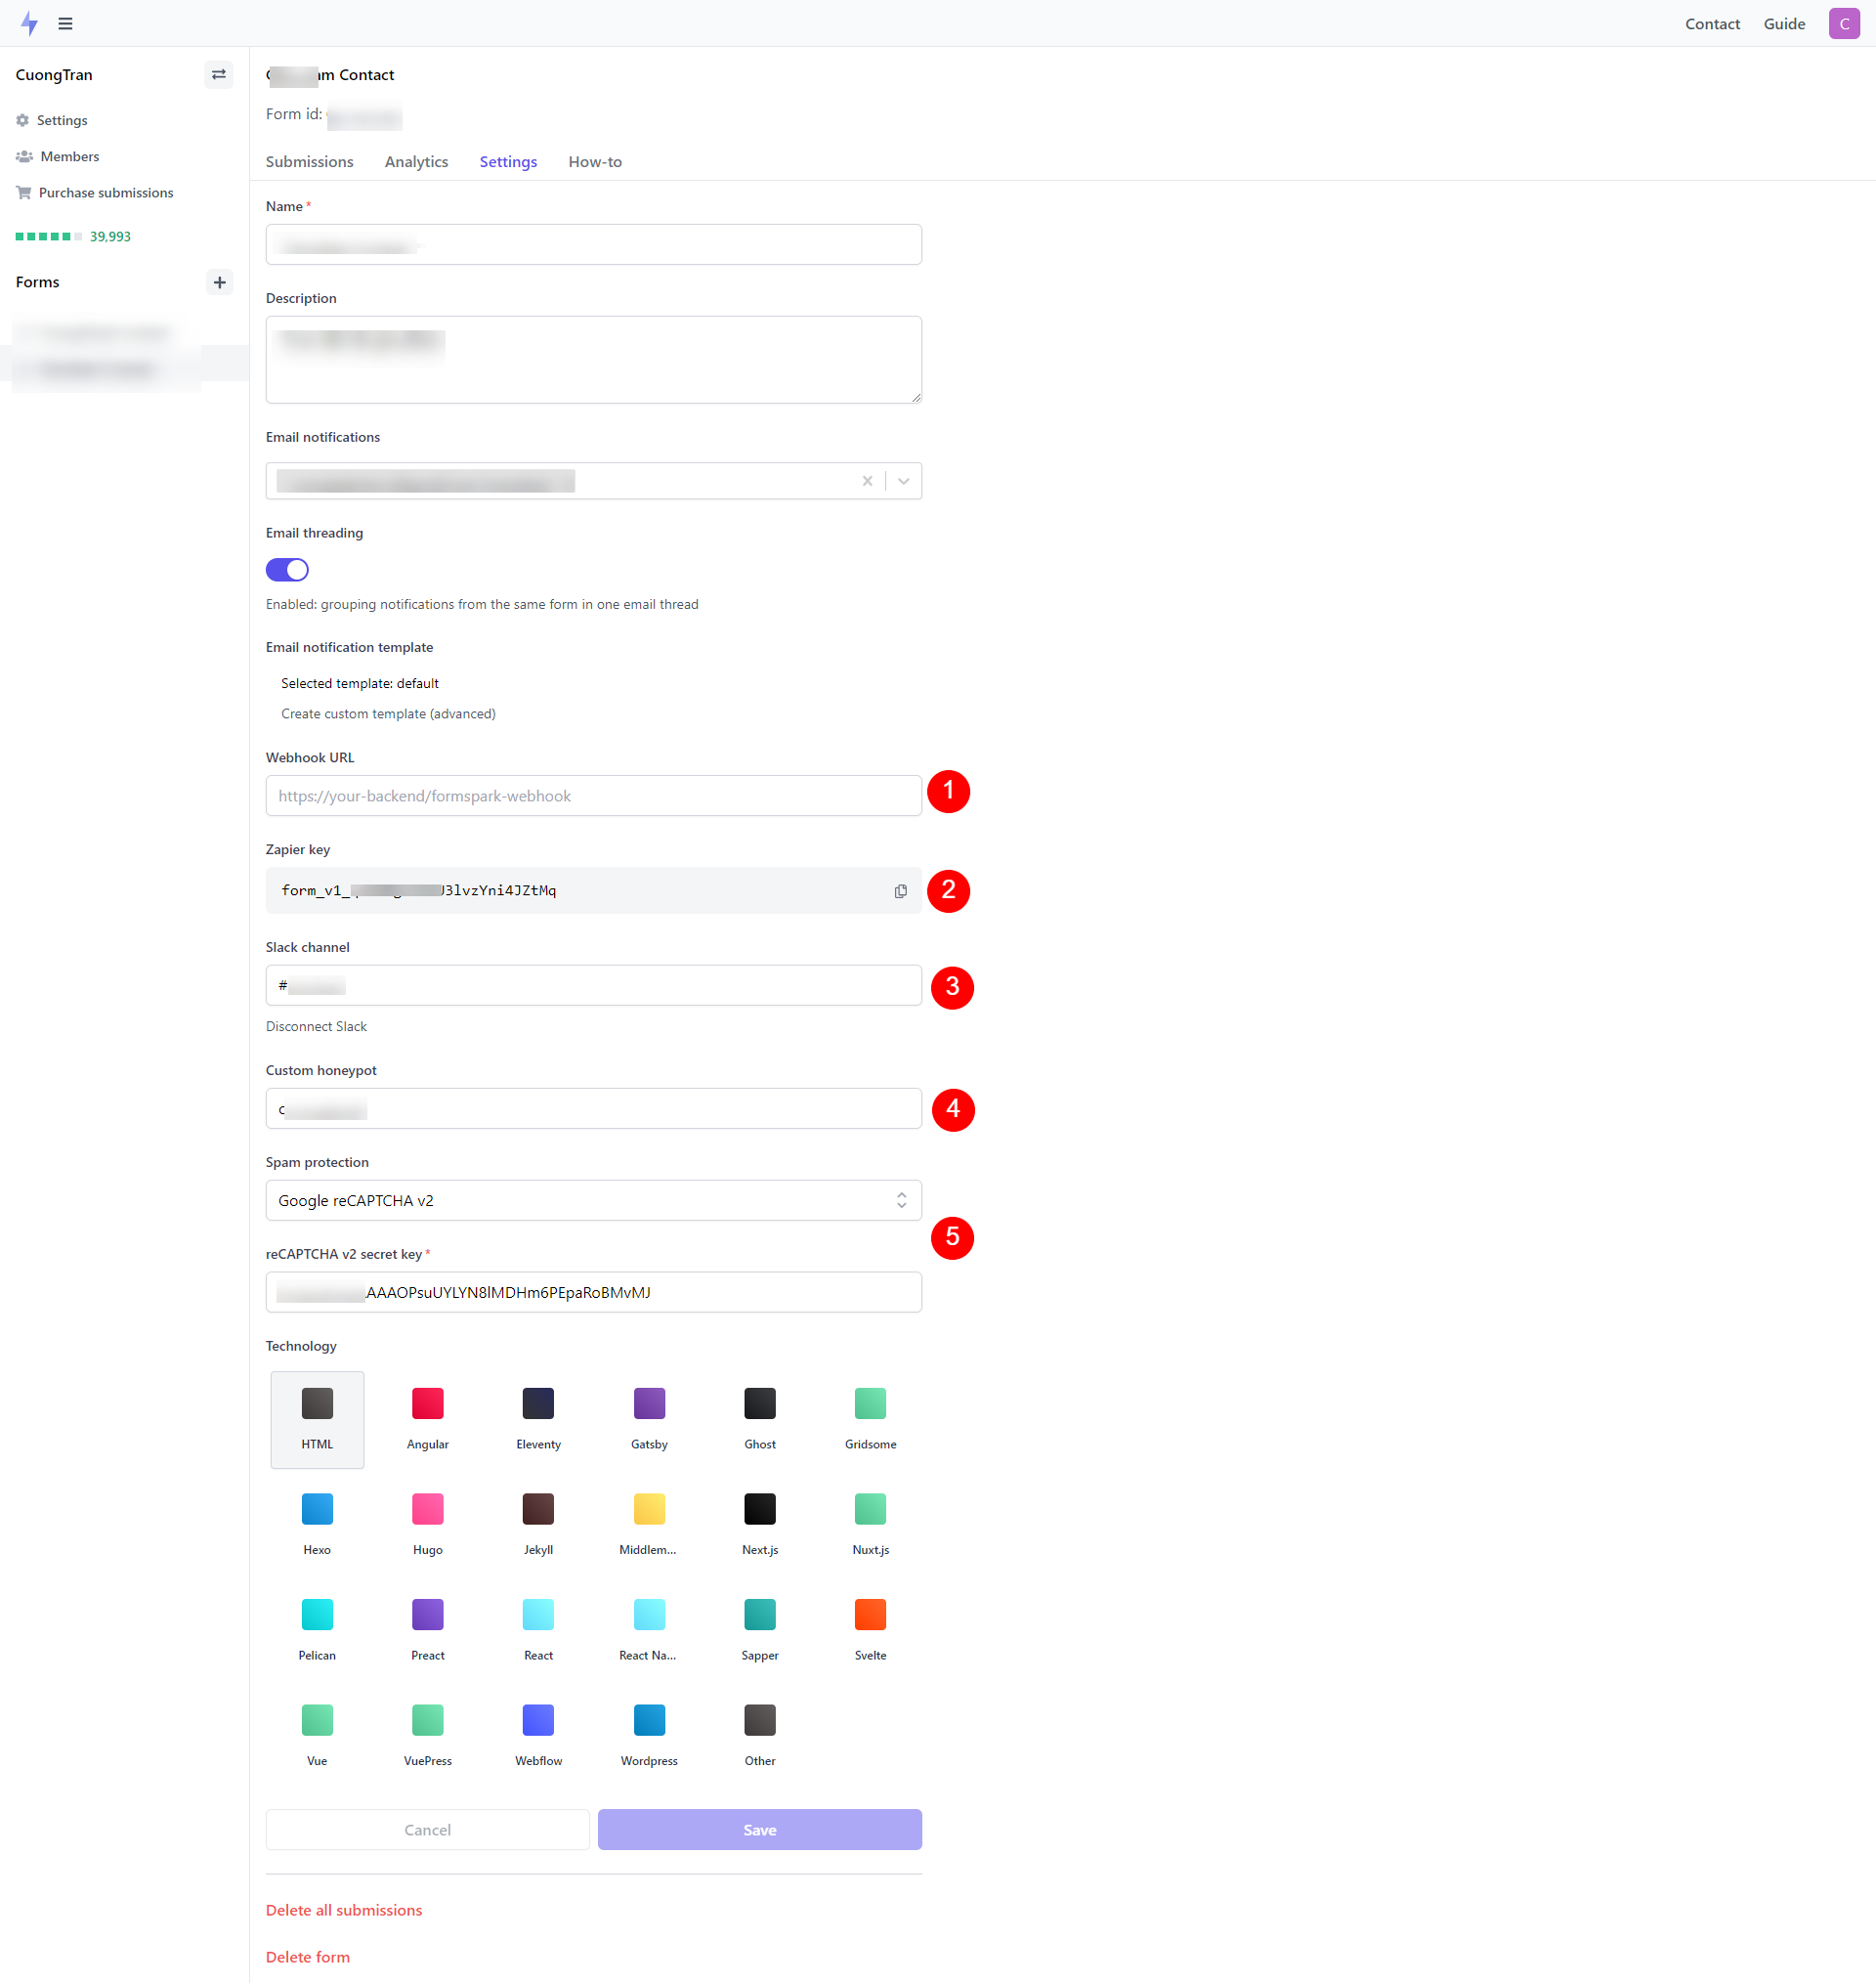
Formspark allows you to send notification emails to multiple recipients (great when you're working in a group).
Not stopping there, Formspark also has built-in Slack channel notifications for you, I always use Slack and this feature really satisfies me.
Even if you don't use Slack, you can receive notifications via Telegram or Discord indirectly via webhooks. Yes, Formspark supports webhooks as well.
The added advantage is that Formspark allows you to reply to the person who sends you a message by replying right in the email 🤫 (remember to have a business mailbox, don't use your personal Gmail to reply).
Formspark's notification system in my opinion is a 10-point must. It is difficult for opponents to do the same.
In addition, Formspark automatically sends you statistical reports every week which is very convenient.
Below is an example form generated using Formspark, and it incorporates Cloudflare Turnstile to combat spam. It inherits my theme with additional classes.
Final Thoughts...
Note that Formspark does not have its own SMTP, so it is not possible to reply to senders in the Dashboard. The optimal way is always to use Direct Reply. This feature will allow you to reply to senders directly to your business mailbox.
The next note is the feature that automatically sends a confirmation email to the sender. You can still do it with Webhooks, but it requires you to use middleware like Zapier or similar.
If you want to hide the Formspark brand when the sender is done, then you need to redirect the redirect to the URL you created (create a thank you page or confirm).
Good luck!
Clap