

Publish with Profit. Transform your Words into
Create a blog and newsletter to reach a global market and maximize your profits with ghost
If you use your own domain email to contact potential partners, you're significantly more likely to get a response than using a personal email.
With custom domain emails, partners will easily recognize your identity and website content, helping to ensure the accuracy of the information you present. This is the basis of a successful long-term partnership in the future.
In this tutorial I will help you create a private domain email using Cloudflare Email Routing in step-by-step details with the following characteristics:
- Free
- Easy installation
- Convenient to use
- Receive and send emails with Gmail
- Domain email settings for Ghost blogs
About Cloudflare Email Routing
Cloudflare Email Routing is a free email forwarding service from Cloudflare that helps you create a domain email address simply with just a few taps.
In addition, all forwarded emails will not be stored on Cloudflare's servers, but will be forwarded directly to your personal mailbox for your security and privacy.
Cloudflare Email Routing also offers email tracking to help you see if emails forward succeed or fail.
Set up email receipt with Cloudflare Email Routing
To set up receiving email using Cloudflare Email Routing, you need to make sure your domain's DNS is managed by Cloudflare (If you don't know how, refer to the video below).
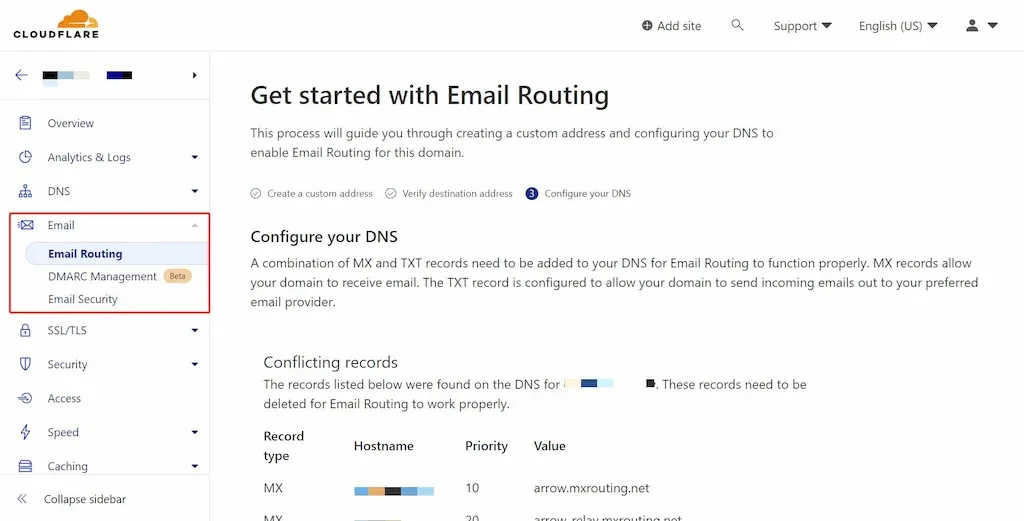
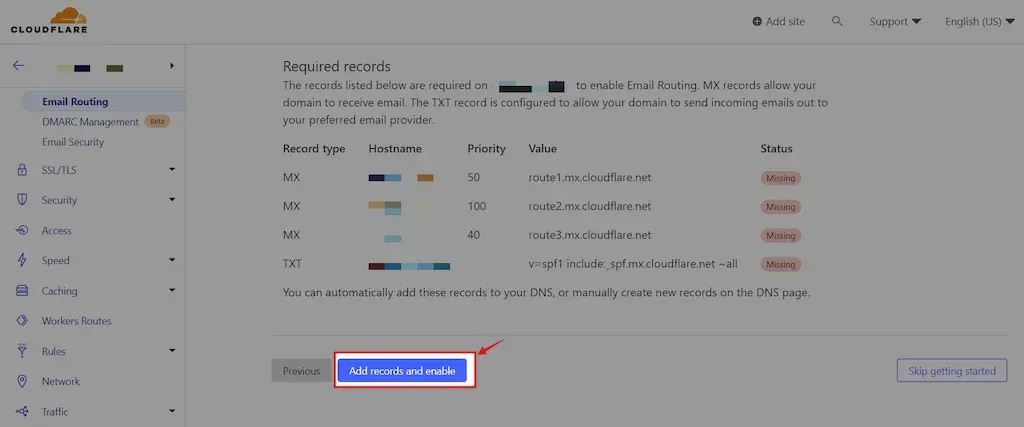
Next, go to the Email tab to configure DNS automatically, Cloudflare will automatically add the necessary DNS records for you.
If an error occurs, check the conflicting DNS records section (because you have installed email services such as Mailgun SMTP) and delete all MX records in DNS (Mailgun MX you feel free to delete because it is not necessary) so that Cloudflare adds new ones to avoid conflicts with old records.
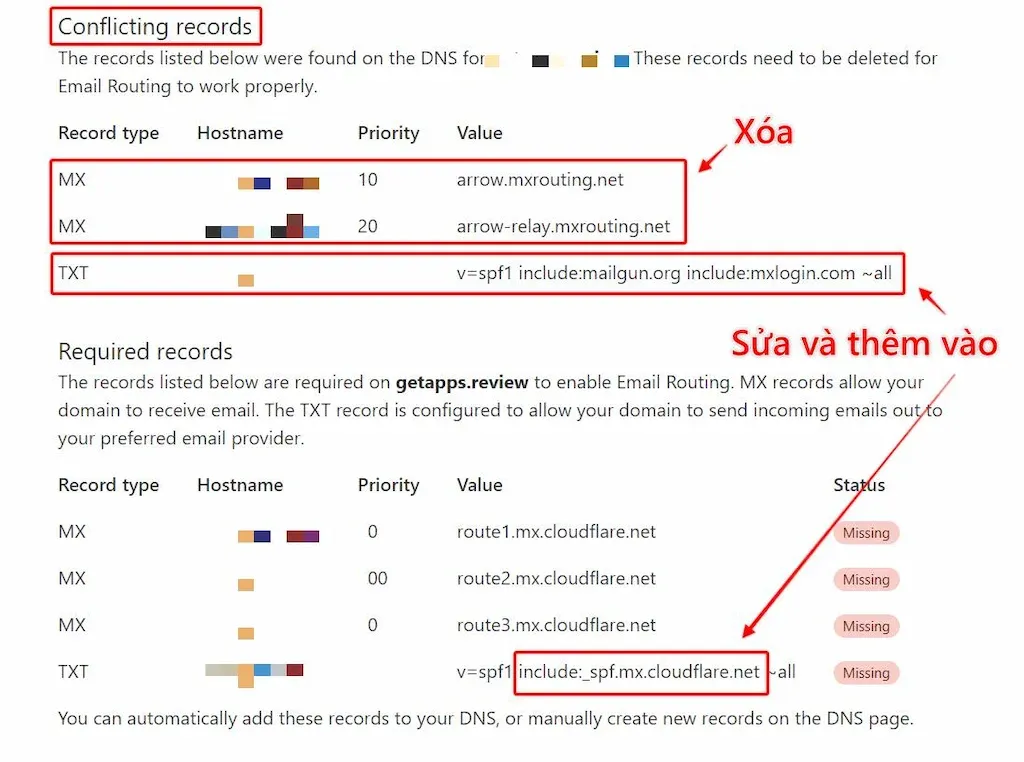
include:_spf.mx.cloudflare.netAfter the automatic installation is complete, you will have 2 installation options:
- Custom addresses – Forward only specified domain names. You set email forwarding only when someone sends to the email address you specify as admin@domain.com only.
- Catch-all address – Forward every email sent to an email with your domain (no-reply@domain.com, admin@domain.com, support@domain.com, blabla@domain.com,...)

All of the above options will forward the email received to your personal Gmail (Destination addresses) or multiple emails at once, of your choice. You manually add your Gmail to receive forwarded emails.

So complete the email reception setup for your domain email. Next is the part that sends outbound emails from custom domain emails.
Email sending settings with Gmail SMTP
Cloudflare only forwards emails to your personal inbox for you, only 1-way.
If you want to reply to or email a contact, you have to manually set up SMTP to send, and we have free Gmail SMTP from Google.
Here's how:
- You MUST enable 2-factor security of your Gmail account. Enable 2FA security for Gmail here.
- Create a Gmail App Password. Go here to create an App Password. You must copy the password again to use in step 5.
- Add email alias to Gmail. Go to Gmail > Setting > Accounts and Import > Send email as: > add another email address. Quick links.
- Fill in the sender information including Sender Name and Sender Email. With Sender email, you'll use the domain email you want. Remember to uncheck "treat as an alias".
- Fill in the Email information. SMTP is , Username is your personal email (original Gmail), Password is the password you created in step 2, Port: , TLS remains the same.
smtp.gmail.com587 - Claim. You'll receive an email from Gmail confirming whether you're the owner. Follow the instructions in the email to confirm (fill in the code).
- Complete. Now you can send emails by email by your domain name. When you reply to an email message or compose a new message, click the From box to select the sender. You will see your Domain Email and proceed to send the email as usual.
Watch the detailed video tutorial below
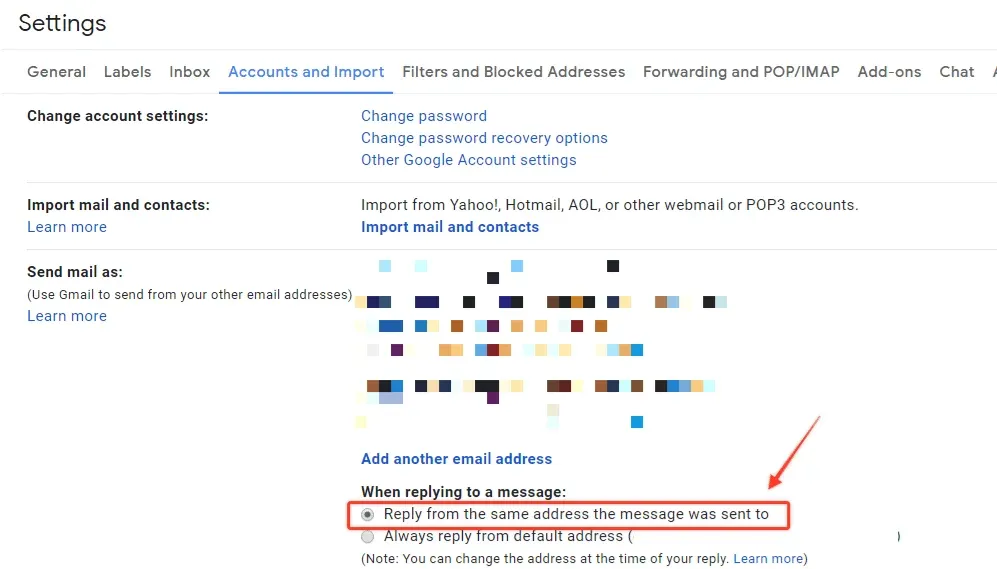
Next, go to Gmail to Settings > Accounts and Important > Select Reply from the same address the message sent to to ensure you will reply to every email forwarded with your own domain email.
If an email forwards to spam for some unknown reason, there are 2 things you can do to make sure the forwarding email doesn't go to spam:
- Add your custom domain email to your Gmail contacts. Like how you add a new contact on an Android phone.
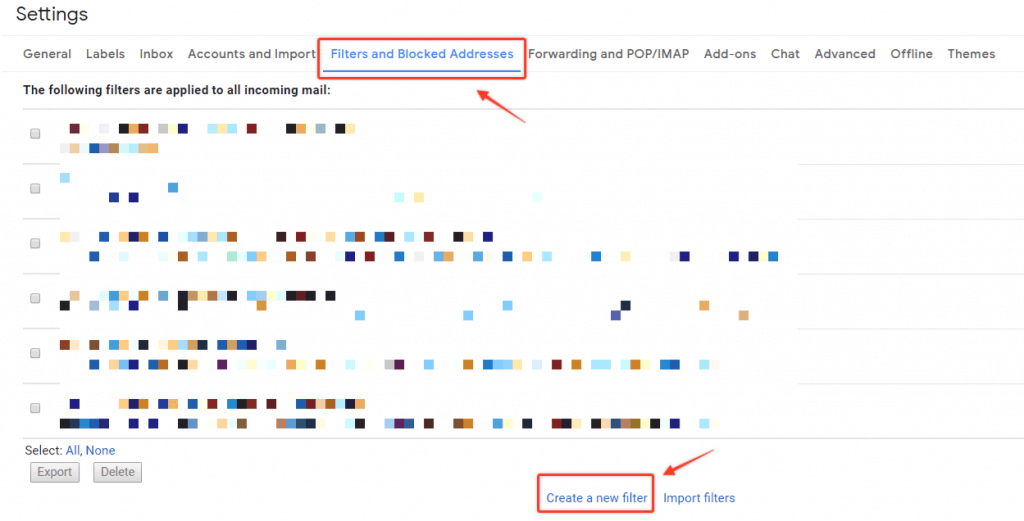
- Use filters to force emails not to go to spam.
Set up domain email for ghost
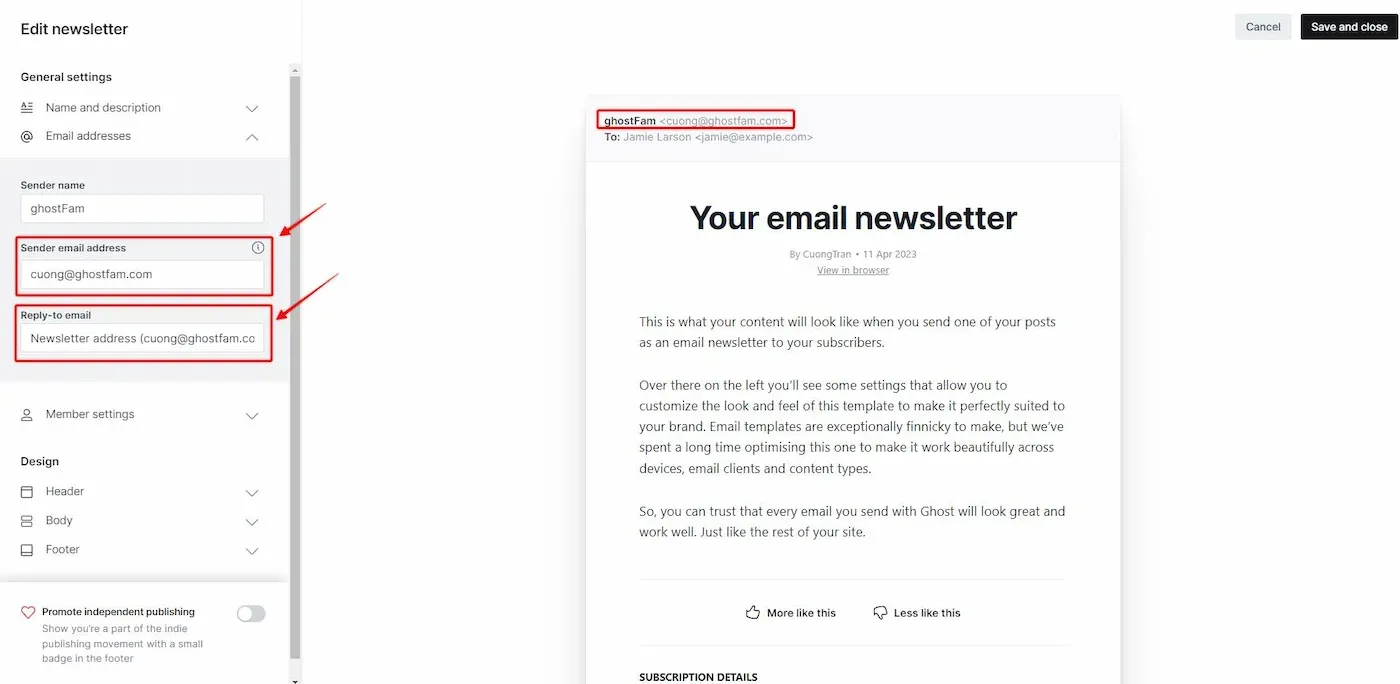
As you know, ghost has a built-in feature to send emails simultaneously via SMTP of Mailgun, the default outgoing email will be . However, ghost still allows you to change that default email address no-reply@domain.com
But to redeem it, it is mandatory that you have your own domain name available to receive authentication emails from ghosts.
After redeeming and saving, you will receive an authentication email from your ghost blog, you click on the authentication link to complete the email exchange process in the ghost.
Final Thoughts...
You are free to add as many domain emails as you want, all those domain emails will forward to your personal email as installed as instructed above.
If you find it confusing or failing to make it, leave a comment below, I will help you.

Cuong is passionate about digital publishing, specializing in leveraging the power of platforms like Ghost and WordPress, while sharing effective practical SEO writing techniques based on these tools.
ghostfam.com